I have recently had reason to try out Rapid Harness to draw harnesses for assemblies, I found Rapid Harness to be a bit clunky; A fair while ago I came across WireViz via Hackaday and decided to give that a go for CADing up the loom drawings.
WireViz is Free and Open Source, so there is no cost to using it, and there are no limitations on use; including being able to use it for commercial designs.
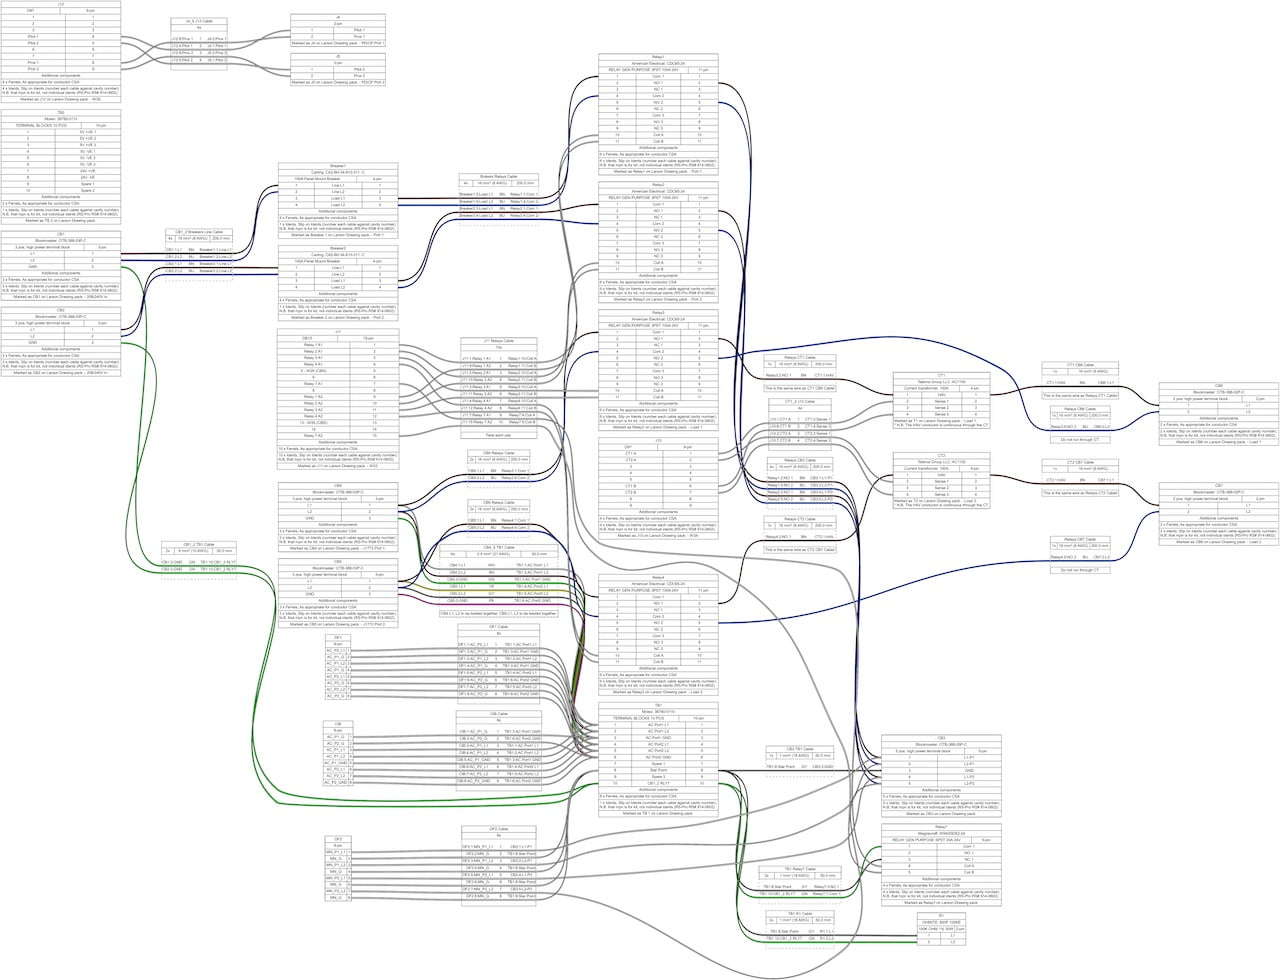
On the right, you can see one of the drawings I have produced to document the loom for something I am working on; the use of a YMAL document makes it easy to store the files in Git.
I use brew to manage software on my mac, so it was easy to install:
/bin/bash -c "$(curl -fsSL https://raw.githubusercontent.com/Homebrew/install/HEAD/install.sh)"
brew install libjpeg
brew install graphviz
pip3 install wireviz
Automotive harness and harness diagrams are something I have worked with before, so learning how to use WireViz will be handy for drawing looms.
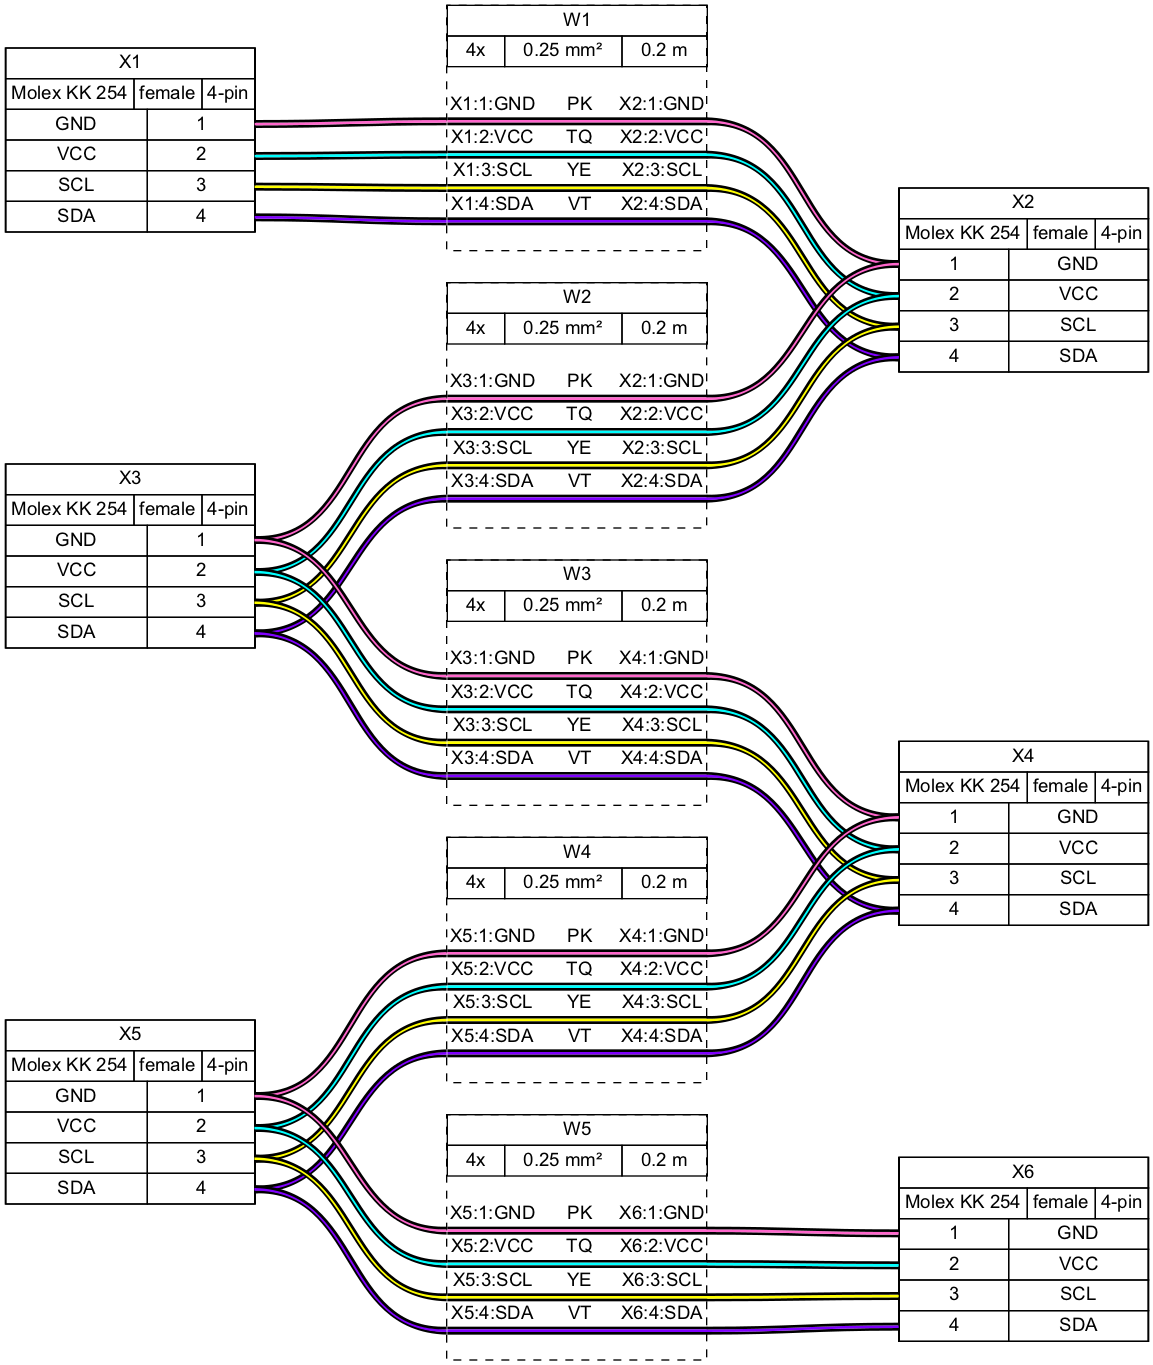
There are lots of examples on the WireVis GitHub page, taking you from simple two connector looms, too much more detailed harnesses

Theharnesses I have drawn up for work can not really be shared here, unfortunately, but I have had to split it up into multiple diagrams as they were getting un-wieldly.
My attempts with Rapid Harness were causing me issues far before WireVis got problematic, one of the looms I am drawing has over 25 connectors, and 22 cable bundles all interconnected…
Harness Example
Harnesses are defined using a fairly simple YAML syntax:
connectors:
X1:
type: D-Sub
subtype: male
pincount: 25
pins: [1,14,3,16,5,18,7,20,9,22,11,24,13]
pinlabels: [ SENSE_P_1, SENSE_N_1, SENSE_P_2, SENSE_N_2, SENSE_P_3, SENSE_N_3, SENSE_P_4,SENSE_N_4, SENSE_P_5, SENSE_N_5, SENSE_P_6, SENSE_N_6, GND ]
X2:
type: F48
subtype: female
pincount: 48
pins: [ z2,b2,d2,z4,b4,d4,z6,b6,d6,z8,b8,d8,z10,b10,d10,z12,b12,d12,z14,b14,d14,z16,b16,d16,z18,b18,d18,z20,b20,d20,z22,b22,d22,z24,b24,d24,z26,b26,d26,z28,b28,d28,z30,b30,d30,z32,b32,d32 ]
cables:
W1:
gauge: 0.25 mm2
length: 0.2
color_code: DIN
wirecount: 12
shield: true
connections:
-
- X1: [1,14,3,16,5,18,7,20,9,22,11,24]
- W1: [2,1,4,3,6,5,8,7,10,9,12,11]
- X2: [d4,z2,d10,z8,d16,z14,d20,z18,d26,z24,d32,z30]
-
- X1: 13
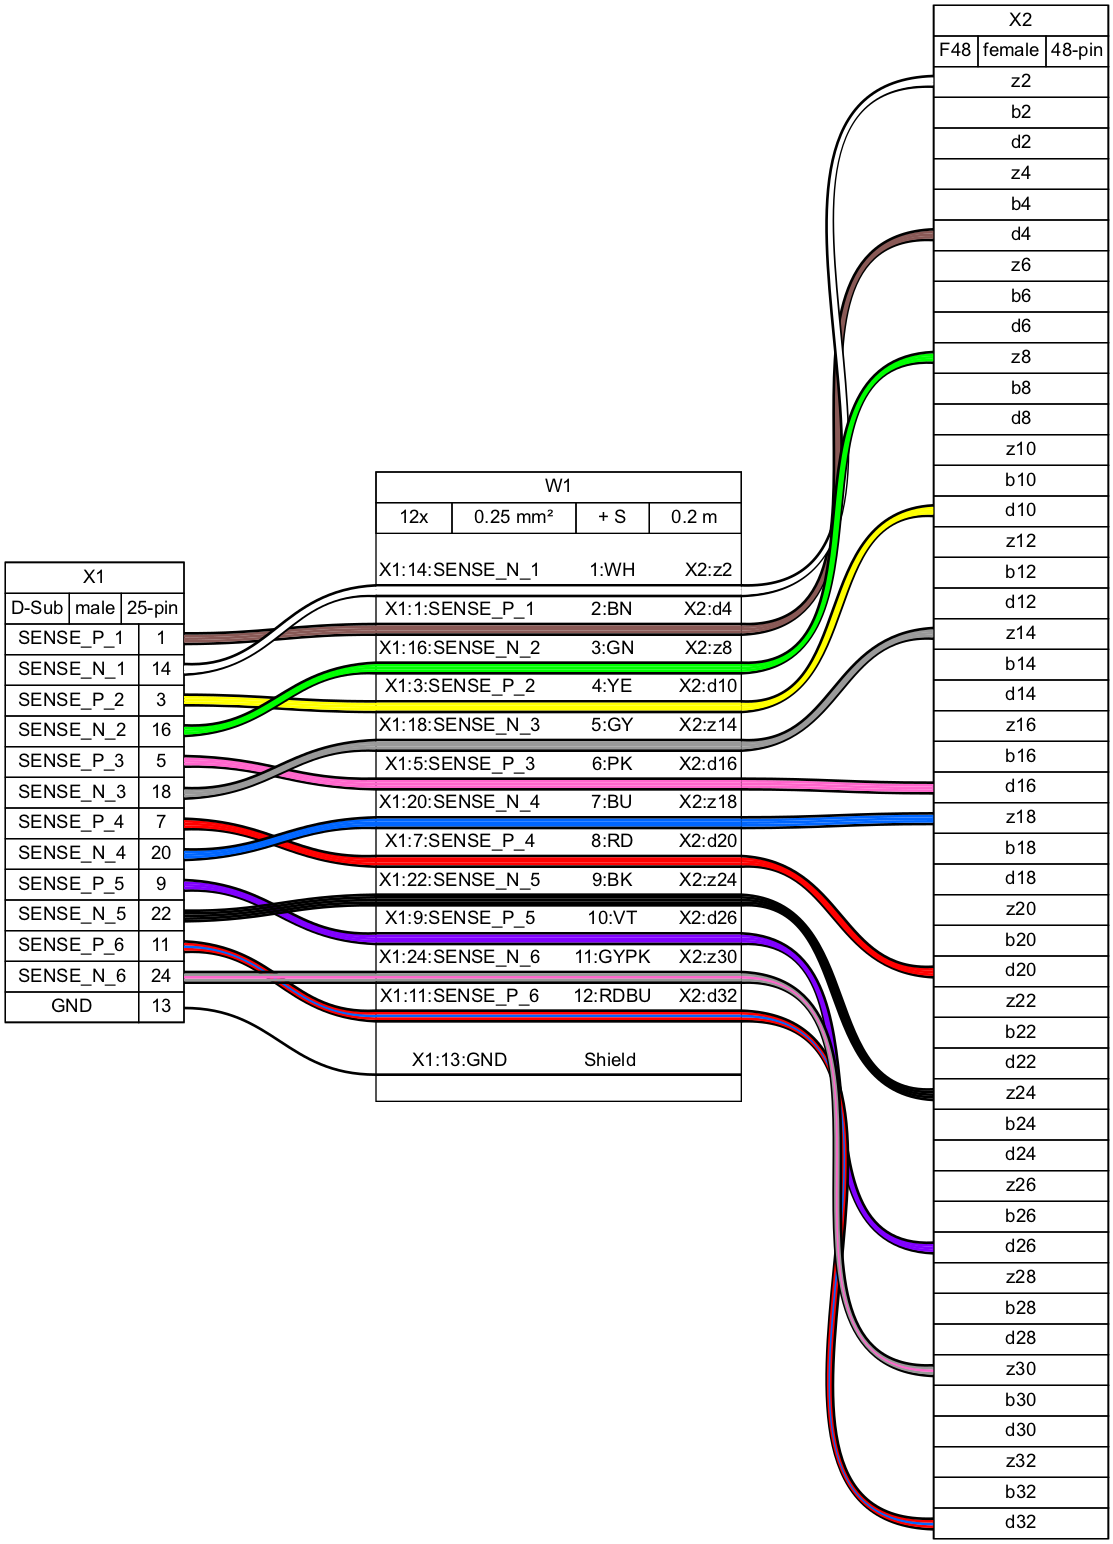
- W1: sThe above code produces the following image:
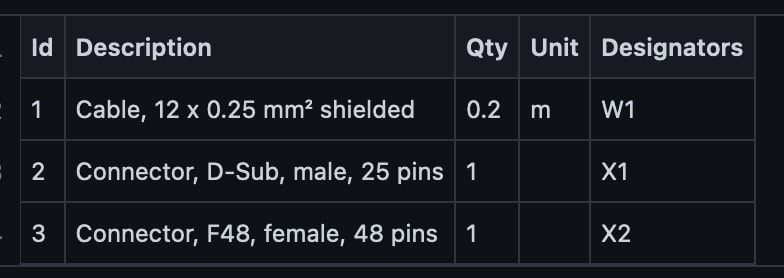
Another nice thing that you get from this is a Bill of Materials; while it is fairly basic, its a start:
If you save the above code to the file loom.yml, then the command that would be run to create the above diagram would be:
wireviz loom.ymlWhere next?
You can expect to see me start to use WireViz to document my personal projects going forward; such as my DefLander project.


2 thoughts on “Wiring harnesses in WireViz on macOS”
Great to see you are using WireViz. We are also using it at Devtank and it produces some really nice visuals. These open source tools can only get better!
My wife has been working on making improvements 🙂